We may earn revenue from the products available on this page and participate in affiliate programs.
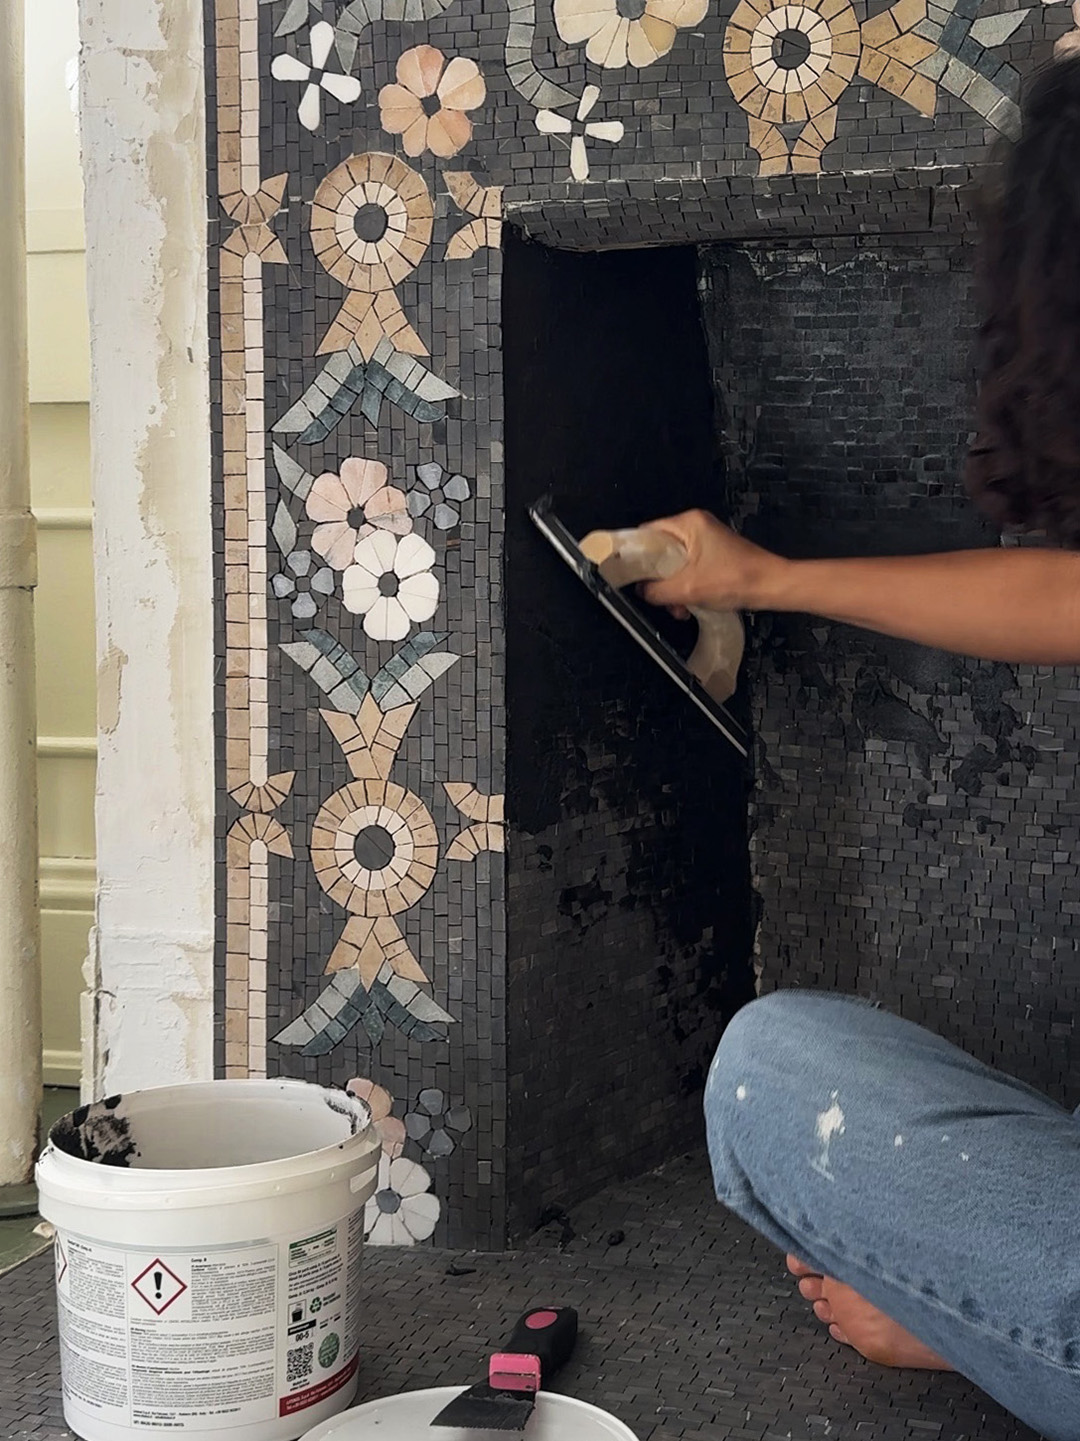
Of the four fireplaces in Brenda Stearns’ 1850s Indiana home, the one in the dining room is the only one that doesn’t work. But that doesn’t mean she didn’t give it some love. “This fireplace isn’t up to code based on today’s regulations,” she says. “So instead of spending thousands of dollars on trying to make it up to code, we decided to keep it as a decorative feature.” No stranger to DIY renovation—Stearns has been updating her historical home room by room and sharing the results on her instagram account @she_plusfive—she set to work installing whimsical mosaic tiling, building a new mantel, and giving the finished project its own version of flickering flames.


Match the Aesthetic to Your Home’s Age
A Victorian-era fireplace calls for Victorian-era design inspo. While scrolling Pinterest, Stearns noticed that many fireplaces from that era showcased intricate tile artwork. “I then started researching mosaics and that’s when I came across the company Mozaico,” she says. Stearns fell in love with a design on their website called Garden Gate. “I love that it’s unique and abstract—there are no straight lines. It’s also feminine, in a way, because of the flowers and the curved details in the leaves and branches.”
Keep the Whole Room’s Color Scheme in Mind
Stearns initially wanted to customize the mosaic’s colors, bringing in blues and a touch of red. But before a mockup of the new look came back from Mozaico, Stearns put up wallpaper in the room and painted all the trim ivory. She says, “By the time the image came back and I saw it against the wallpaper, I realized it kind of clashed, so I decided to go back to the mosaic’s original colors from the website. Those are the colors we have now, and I think it adds an earthy tone and keeps it all in one neutral scheme.”


Know that Tiling Takes Time
Even though Mozaico designs come as sheets of tile pre-cut according to custom measurements—speeding up the tiling process—this DIY project still requires patience, often with days between steps for adequate drying. “This all sounds like it went on really fast, but it was like weeks of work,” says Stearns, who found pockets of time to work on the project between homeschooling her kids.
“We started by removing the old mantel, which wasn’t original to the house and actually butted up against a steam pipe, then we repaired some damaged plaster,” says Stearns. “Next, I realigned the bricks at the base of the fireplace and covered them with a coat of joint compound, then waited two or three days for everything to fully dry before priming the whole space with Kilz primer. Once that dried, I spread the mortar and added the mosaic pieces. I did the inside part first, then the floor area, and the surround the following day. I then waited two days for that to dry and then grouted the entire thing, which was probably the hardest part of the whole project.”
Salvage From Other Parts of the House
For the new mantel, Stearns repurposed pieces of wood she found in the attic. She says, “The previous owners left a bunch of wood and trim—really intricate, cool pieces—so I dug some of those out and cut them to reuse them for the mantel.” She then primed the whole mantel and painted it the same ivory color (Benjamin Moore Ancient Ivory) as the rest of the room’s trim. Stearns also repurposed an antique brass fireplace fender that the previous owners left in another room in the house. “It’s got these little lion’s feet and it’s very Victorian,” she says.

Curate a Candlelit Glow
Because the fireplace is non-functioning, Stearns added an array of flameless LED taper candles she bought on Amazon. “Eventually, I want to replace them with unique candles I find while antiquing, but it works for now,” she says. “I turn on all the candles when we’re having dinner and it’s so romantic.”
