We may earn revenue from the products available on this page and participate in affiliate programs.
In Renovator’s Notebook, homeowners open up about the nitty-gritty of their remodels: How long it really took; how much it actually cost; what went horribly wrong; and what went wonderfully, serendipitously, it’s-all-worth-it-in-the-end right. For more tips to nail your next project, follow @reno_notebook.
The first time designer and DIYer Ajai Guyot drove down her street, she was shocked by the amount of Tudor-style homes that lined the lane. The rows of little cottages was an unusual sight in Los Angeles. “The moment I laid eyes on our home, it reminded me of our trip to the Cotswolds during Christmas a couple of years ago—it was love at first sight for us,” she says. But Guyot couldn’t say the same for the kitchen.
While the galley space was certainly bigger than her and her husband’s previous kitchen in Atlanta, Guyot was bummed to have to cook in such a long and narrow area again. Her goal in renovating this kitchen was simple: “Make myself fall in love with it,” she states. Luckily, this go-round, they had decided they wouldn’t spend nearly as much money as they did on their first reno (in Georgia, they shelled out $25,000 on upgrades like porcelain floors and pendant lights). This time, Guyot transformed the space for less than $6,500. Ahead, in her own words, the seasoned renovator shares how she pulled it off.
The Receipts
Here’s a taste of what Guyot spent on her kitchen.

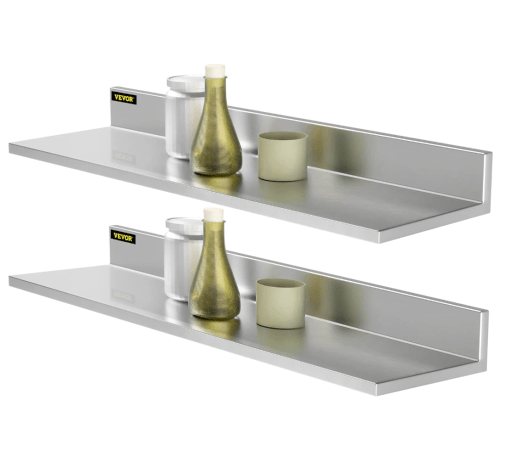
- Stainless steel shelves: $65
- Outlet covers: $26
- Range hood: $400
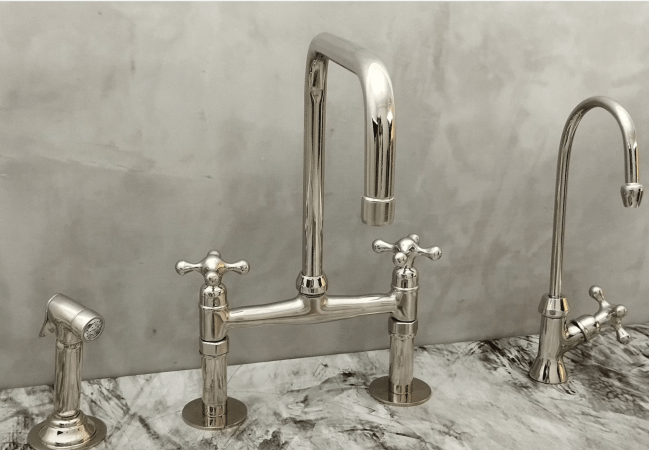
- Faucet: $392
- Fridge: $700
- Additional lower cabinets: $400
- Quartzite counters: $1,800
Save: Recycling Packing Materials
I used packing paper, tape, and a drop cloth from our move to prep the kitchen for painting and sanding.
Save: Painting the Cabinets (With the Doors On)

For me, painting the cabinets without removing the doors worked better because I don’t have a large workspace, and sanding, priming, and painting the inside of the doors is easier to do when they’re on (I could swing them back and forth by the old knobs). Plus I’ve discovered that I like the look of cabinets that are painted with a brush instead of a roller. I applied a custom color derived from Farrow & Ball’s Old White. I love the base of this color but wanted mine to be a bit more yellow, a bit darker.
Save: Installing Additional Lower Cabinets Myself
After becoming a mom and nursing for years, and also falling in love with cooking, I knew I needed more storage, so I kept all of our uppers and added more lowers this time around. I opted for in-stock unfinished cabinets from Home Depot. I’ve used these before and quite like them. Installing the additional lower cabinet units myself felt really good, especially when the countertop installers came in and complimented my work (I told them it was my first time and they couldn’t believe it!). I store the trash can in the cabinet closest to the patio, and plates, cups, pans, and cooking utensils in the other cabinets.
Save: The Floor Model Refrigerator

I ended up replacing the previous refrigerator because the waterline was severely damaged. The fridge had a tough time closing as well (it was never quite flush). I purchased a floor model from Home Depot because it was marked down. It doesn’t have any dents (thankfully).
Splurge: A Silver Bridge Faucet
I had a nice amount left on an Etsy gift card, so I was like, “It’s now or never!”
Save: Reporting Our Moldy Sink

During our home inspection, two inspectors pointed out the mold [around the sink] to us. A month after we got the keys to our home, it was one of the first things we brought to our insurance company’s attention. They sent someone out to check it, and then granted us approval to have the sink removed and replaced with a $75 deductible. It wasn’t a difficult process; dealing with insurance companies is more of a waiting game—it requires patience. For the sink itself, I’d advise people to check their local countertop warehouses, because there are some great deals out there. My sink came from one and was around $120.
Save: Playing the Role of Assistant


I had one of my contractors come in to create a new arched entry into the kitchen (and I offered to assist for a better price). I love doing this because it allows me the opportunity to learn. We used wood and drywall to create the arches. The wood serves as a stud that allows us to anchor the drywall to it. My contractor plastered, and I sanded and painted.
When I hired our countertop installer, I told him I’d been DIYing the kitchen and was wondering if there was some work I could do to save him on time and me on money. He said I could install the plywood while he was cutting the counters outside. I ended up being a helper of sorts for him, and it all worked out.
Splurge: The ZLINE Stove

I knew I’d fall in love with the kitchen if I gifted myself the stove. I did end up selling our previous stove and microwave (because they were on the newer side) and applied those funds toward our current stove and range hood, so it wasn’t too pricey in the end.
Save: A Touch of Texture

I love how quaint beadboard is. I used a cordless jigsaw to cut each [panel], added a little glue to the back of the board, and then applied each one to the wall with a nail gun.
The textured look I created on my kitchen walls and ceiling is not limewash: I used a masonry brush, two different paints (one slightly lighter than the other), water, and a regular paintbrush. (Check out the process here). I painted the walls one color (two coats) using the regular paintbrushes, and before it dried completely, I followed up by stroking the walls with a lighter color (using the masonry brush), but I made sure to dilute each stroke with water.
Save: Recharge Your Charging Stations

After adding the higher backsplash, I was going to have to upgrade all of the outlet screws to longer ones, so I figured while I was already at it, I’d upgrade the covers as well. I got a really good deal on them (about $25 for a pack of 20).


