We may earn revenue from the products available on this page and participate in affiliate programs.
You’ve broken out your best maximalist dishware and pulled out all the stops with an impressive brunch menu. Sure, blooms in vases will always be chic—but for the ultimate wedding (or baby) shower, you need a centerpiece that matches your style. You need a floral installation.
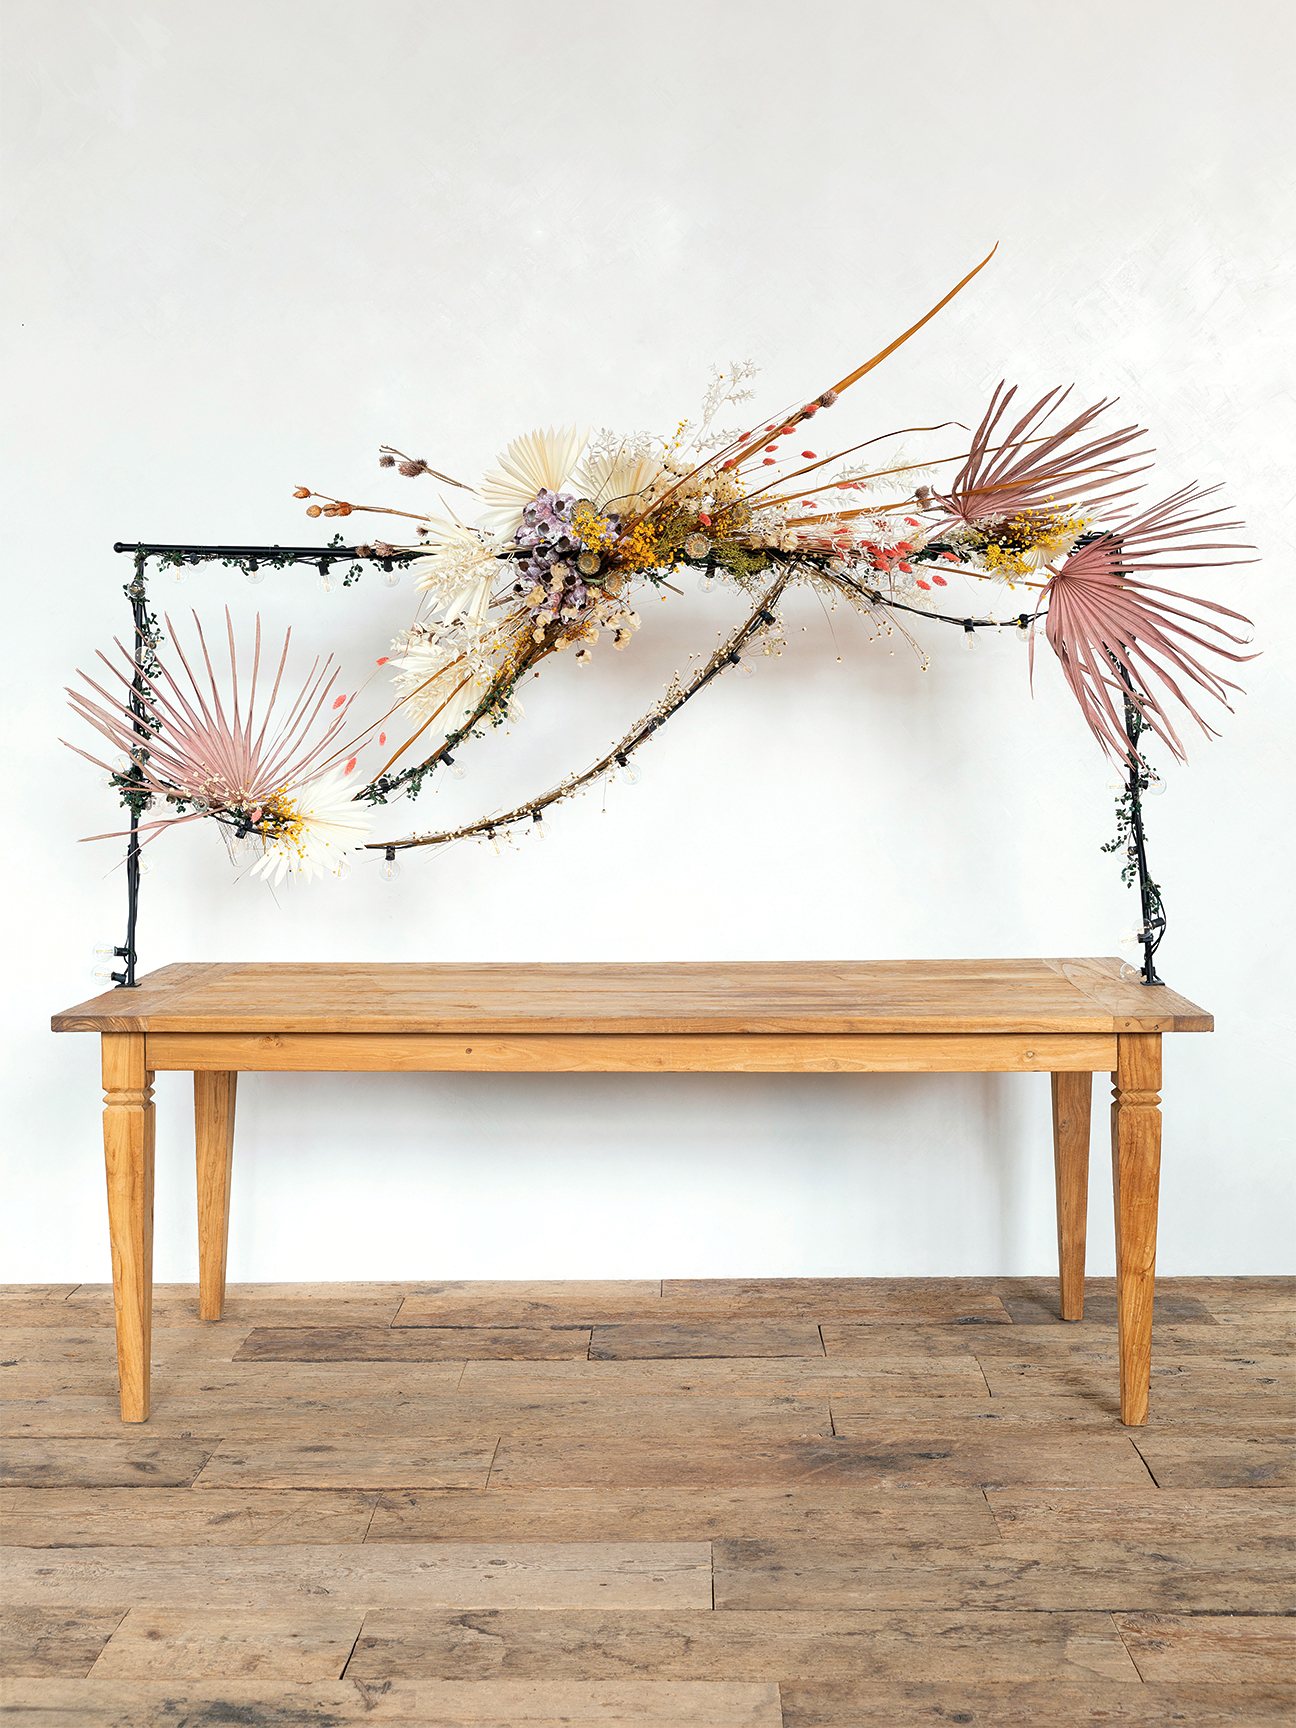
It’s not as terrifying an undertaking as it sounds. We spotted a stunning (and surprisingly easy) display in Terrain’s spring catalog, and it all centers around a simple table rod. The multicolored design features all sorts of dried stems and surprise guests (purple barnacles!), but at its core, it’s really just a $48 over-the-table arch, affixed to the surface.
Yes, $48 may seem a bit expensive for something so ornamental, but think of all the use you’ll get out of it beyond that one event. It’s an ideal fixture for birthdays or dinner parties; all you have to do is switch up the greenery and flowers you intertwine. It’s also a simple way to elevate store-bought blossoms (or whatever you find in your backyard) and flex your creative muscles in the process. We got the how-to from Terrain’s creative photo stylist, Beth Clevenstine, just in time for spring shindigs.

Light It Up
With the rod in place, attach four strands of globe lights. (Terrain used multicolored ones, but plain white bulbs work, too.) Start by winding them around the bar, then let two of the strands swoop down in between the two ends.
Add in Garlands
If you’re using greenery, swaths of that go in second. Clevenstine went with a stone garland, similar to this green quartz one, to switch up the texture.

Loop in the Larger Details
With your dyed leaves and more sculptural finds like twigs at the ready, begin adhering the largest pieces, like the pink palm fronds, with thin garden wire. Then attach the bulkier items using the same method (that’s where the aforementioned barnacles came into play).
Go Wild With Florals
The last piece of the puzzle: weaving dried stems and fresh flowers into the wire to fill in any gaps. Try laying the ingredients out on a table to get a sense of what your finished color story will be, then affix them one by one. It’s really as simple as that.
Get the Look:
See more easy DIYs: I’m No DIY Pro, But This IKEA Hack Took Me 10 Minutes Flat How to DIY a French Tufted Mattress We Spotted the Dreamiest Marble DIY Idea at NYFW
