We may earn revenue from the products available on this page and participate in affiliate programs.
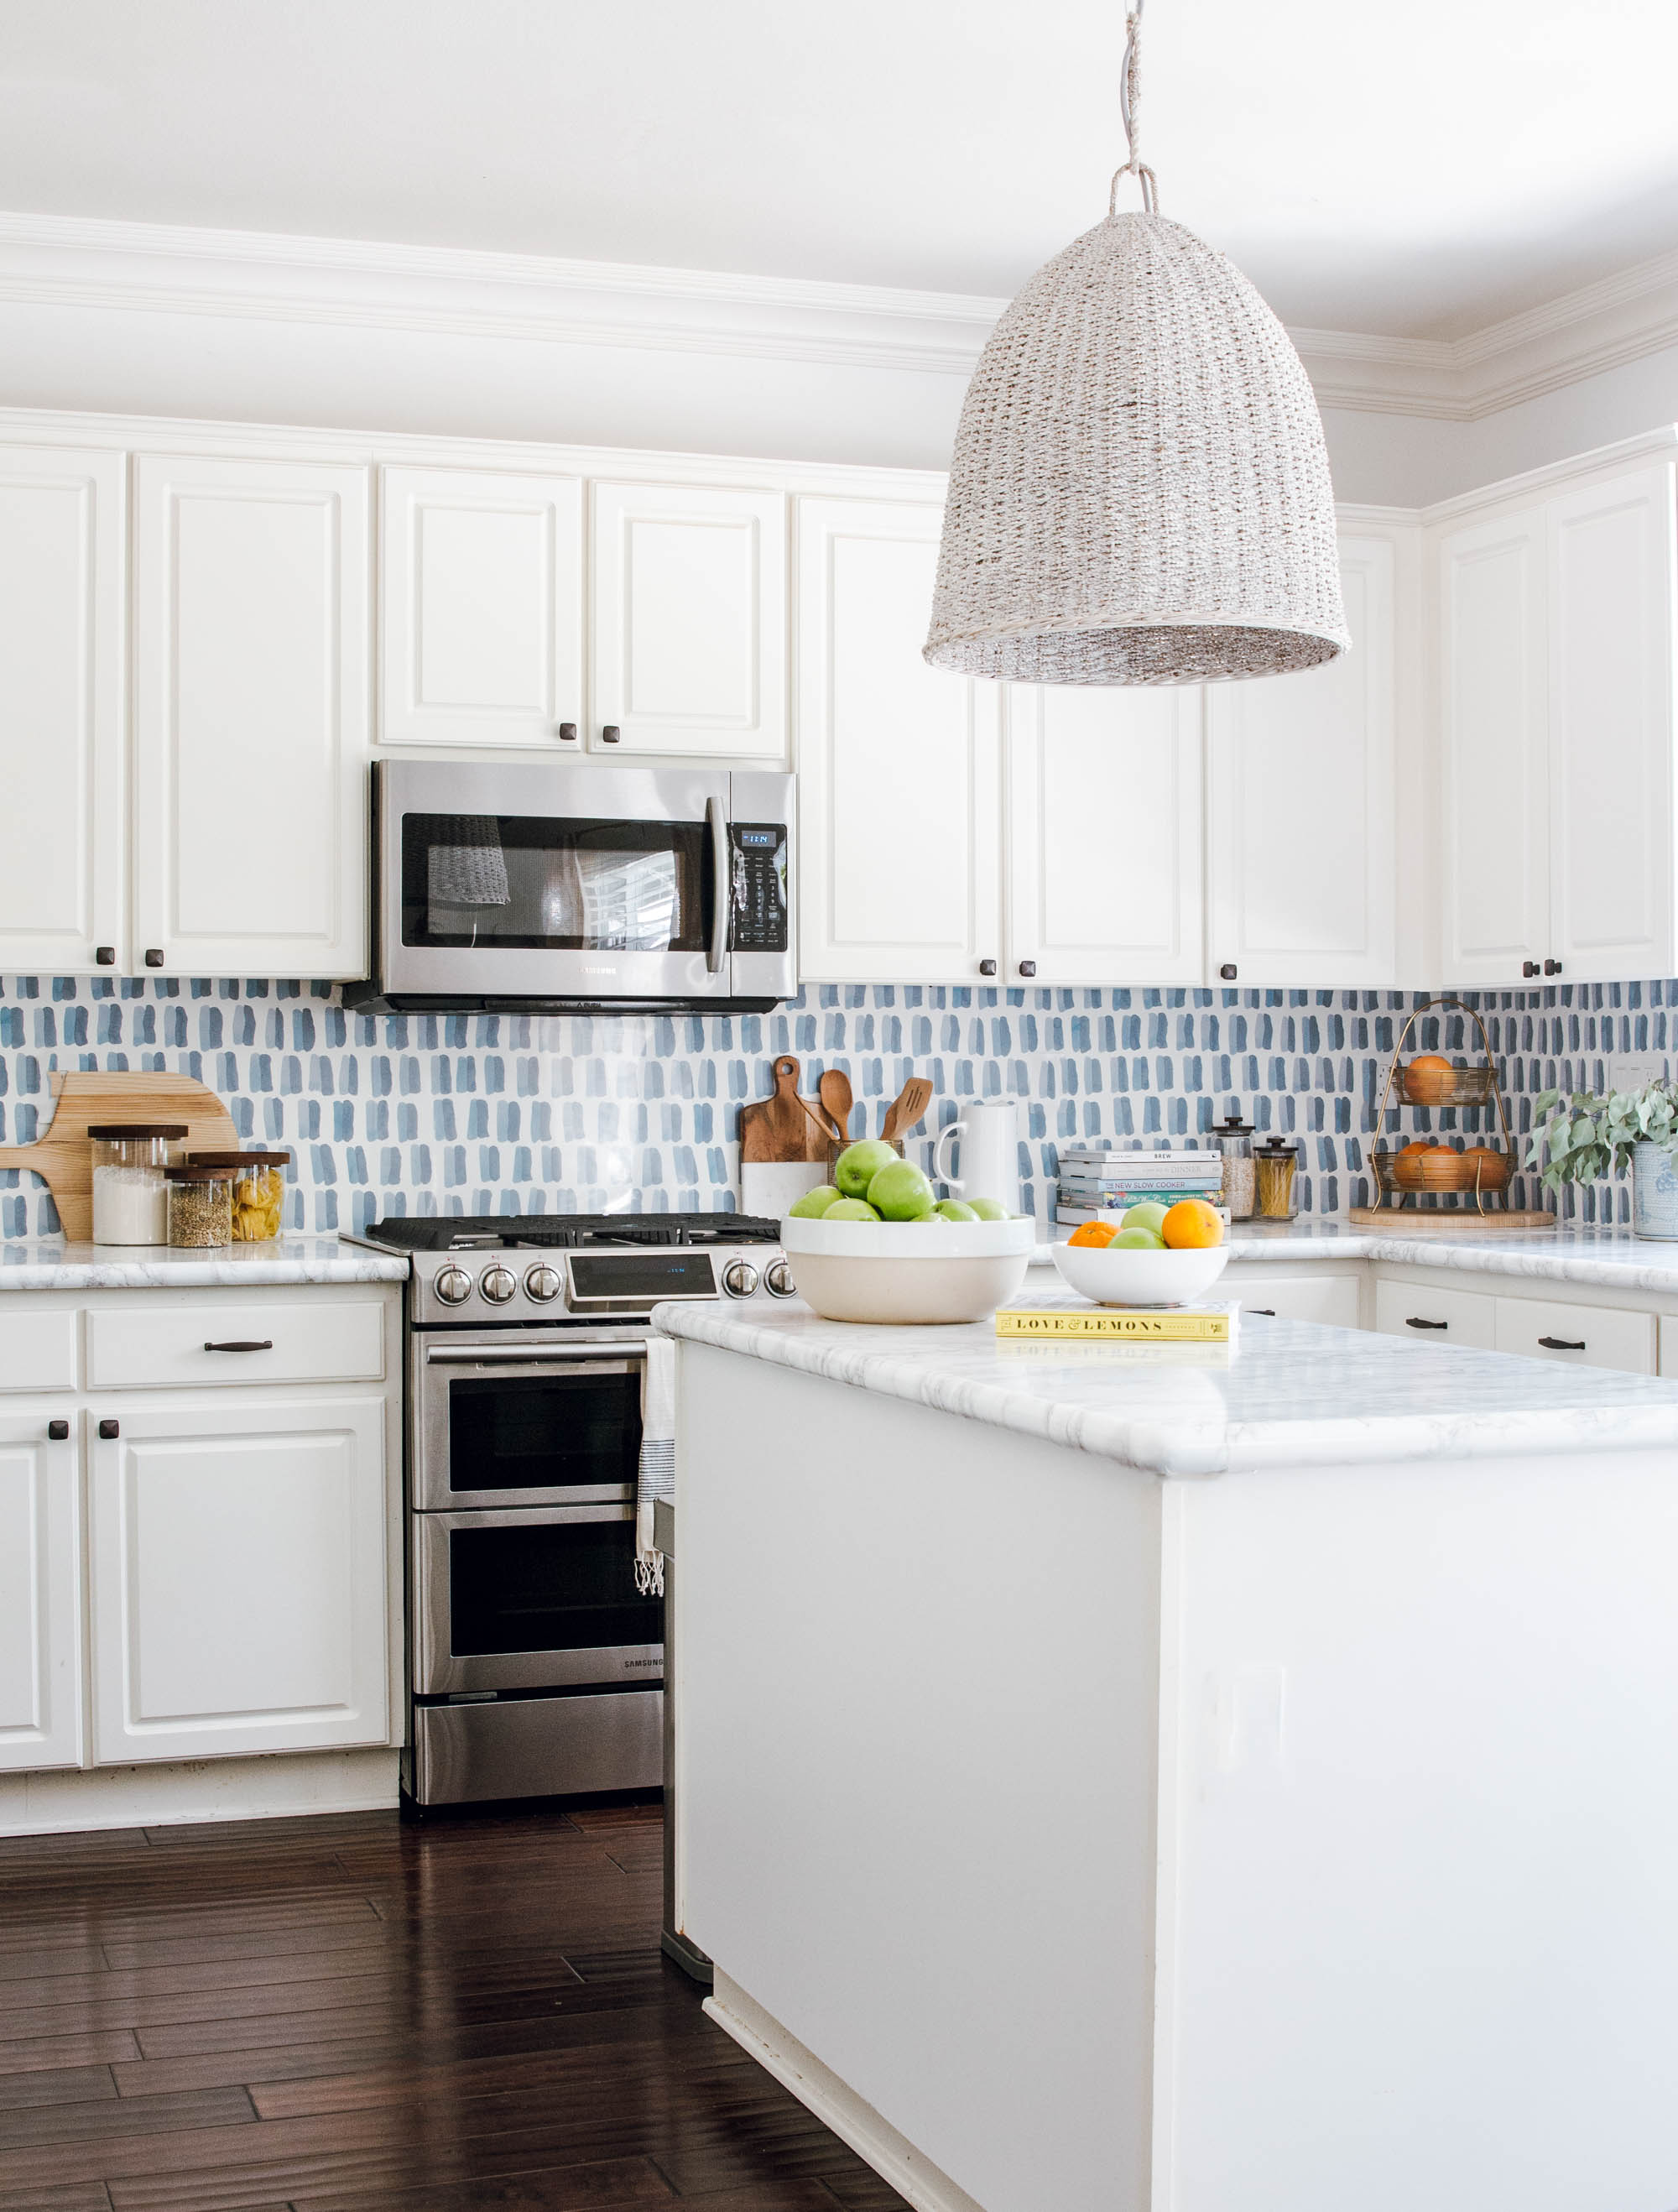
If you live in a rental apartment, your options for a kitchen backsplash are limited. You can either fake it with peel-and-stick tiling or learn to live with the preexisting situation until your lease runs out. Interior designer and blogger Anita Yokota has a third solution: A DIY wallpaper backsplash that’s easy to install and stain-resistant.
“I was sick of staring at stark white walls and no outlet covers,” says Yokota. “I didn’t want to do peel-and-stick again, but some kind of wallpaper felt right. I wanted a pattern that resembled tile in an abstract way—no florals or anything resembling a bathroom.”

Having fallen in love with a watercolor-effect Rebecca Atwood print, Yokota set to work creating a stylish backsplash. The vertical-lined pattern does almost look like tiling from a distance yet a closer look reveals painterly brushstrokes and an ombre two-tone that brings depth to any wall. But while the wallpaper is surely beautiful, Yokota knew that it wouldn’t be the most practical for a high-traffic area like a kitchen—after all, things spill, and the walls behind a sink or stove rarely remain immaculate.
The answer? An easy-to-install plexiglass cover. The protective coating ensures the gorgeous wallpaper’s longevity, a trick that takes standard peel-and-stick tiling to the next level. And though she opted for regular wallpaper, renters might want to choose a removable wallpaper for a statement-making update that won’t endanger security deposits. Head to Chasing Paper or Wallshoppe to track down the temporary wallpaper of your choosing, and then get cracking.
But be warned—the designer admits that prepping the wallpaper does require time and patience: “Installing wallpaper is tricky. You need to start straight so that you don’t start slanting and end up with the pattern slowly going down the wall,” she says. “It took a good two to three hours for my space.” The good news? The rest of this kitchen hack is fairly simple, taking only a couple hours to complete.

We asked Yokota for the lowdown on this low-lift kitchen DIY project. Keep reading to shop our edit of stylish wallpapers to inspire your own backsplash makeover—from the traditional to the abstract, you’re sure to find something in your style.

You Will Need:
- The wallpaper of your choosing
- Wallpaper paste or adhesive, if using permanent wallpaper
- Box cutter or blade
- Large yardstick or ruler
- Wallpaper smoother
- Adhesive glue dots
- Plexiglass
Instructions:
- Prep the area by wiping the wall clean.
- Measure your wall and cut the wallpaper to the dimensions of your backsplash, making sure that each sheet lines up perfectly. Avoid gaps in the patterns by using a box cutter to trim the edges with precision.
- Prep the wallpaper for hanging: If you’re using temporary wallpaper, you won’t need to do much besides stick it in place. If you’re using traditional wallpaper, prep the wallpaper paste and then “book” the wallpaper together for two to five minutes. This entails gently folding both ends, paste side in, toward the center of the strip without creasing the folds.
- Install the paper, starting at the left corner. Remember to slightly overlap the top where the upper cabinet begins, and use the blade to trim any overhang. You’ll need to slightly overlap one strip to the next as you work along the walls.
- Using a wallpaper smoother (Yokota recommends this Home Depot kit), work your way over the paper to get rid of bubbles.
- After ensuring that the Plexiglass is cut to fit your wallpaper, stick it on top of your dried wallpaper by adding glue dots to the corners of the glass.
If you have a thing for painterly patterns…
The paper that started it all—this sketch-inspired blue pattern will bring a bit of understated elegance to your kitchen.
If you love a bold moment…
Maximalists, we found your dream backsplash. Enjoy a graphic moment with this blocked coral paper, which would look great against blue cabinetry since they’re complementary hues.
If you’re working with limited square footage…
Brighten up a tiny kitchen with this sunny yellow print. Given that it’s removable, it’s the perfect solution to a dingy rental space in dire need of a fresh look.
If you don’t take your decor too seriously…
Hand-illustrated by designer Molly Hatch, this playful pattern is great for decorators who are willing to have a bit of fun with their homes. Geometric shapes and a punchy color combo combine for one statement-making backsplash.
If your style is classic, all the way…
For the traditionalists, go classic with a blue-and-white paper. Inspired by vintage Moroccan tile, this wallpaper takes a page from Yokota’s playbook and looks super similar to a traditional tile backsplash—opt for the navy-and-white colorway for a timeless look.
If you’re on top of the latest trend…
Another tile-inspired style, this blush pink wallpaper is a nod to the Art Deco revival we’re currently enjoying.
If you love the moody, saturated look…
This richly colored wallpaper definitely brings the drama. With a 3-D look that adds depth, it’ll take your kitchen cabinets to the next level.
See more easy DIYs: How to DIY a French Tufted Mattress Try This 5-Minute Hack to Disguise an Unsightly TV Life Hack: Put a Bunch of Eucalyptus in Your Shower
