We may earn revenue from the products available on this page and participate in affiliate programs.
In Renovator’s Notebook, homeowners open up about the nitty-gritty of their remodels: How long it really took; how much it actually cost; what went horribly wrong; and what went wonderfully, serendipitously, it’s-all-worth-it-in-the-end right. For more tips to nail your next project, follow @reno_notebook.
Location: Las Vegas
Square footage: 114
Year built: 1990
Top priority: A dining room that invites you to sit and soak in the verdant views.
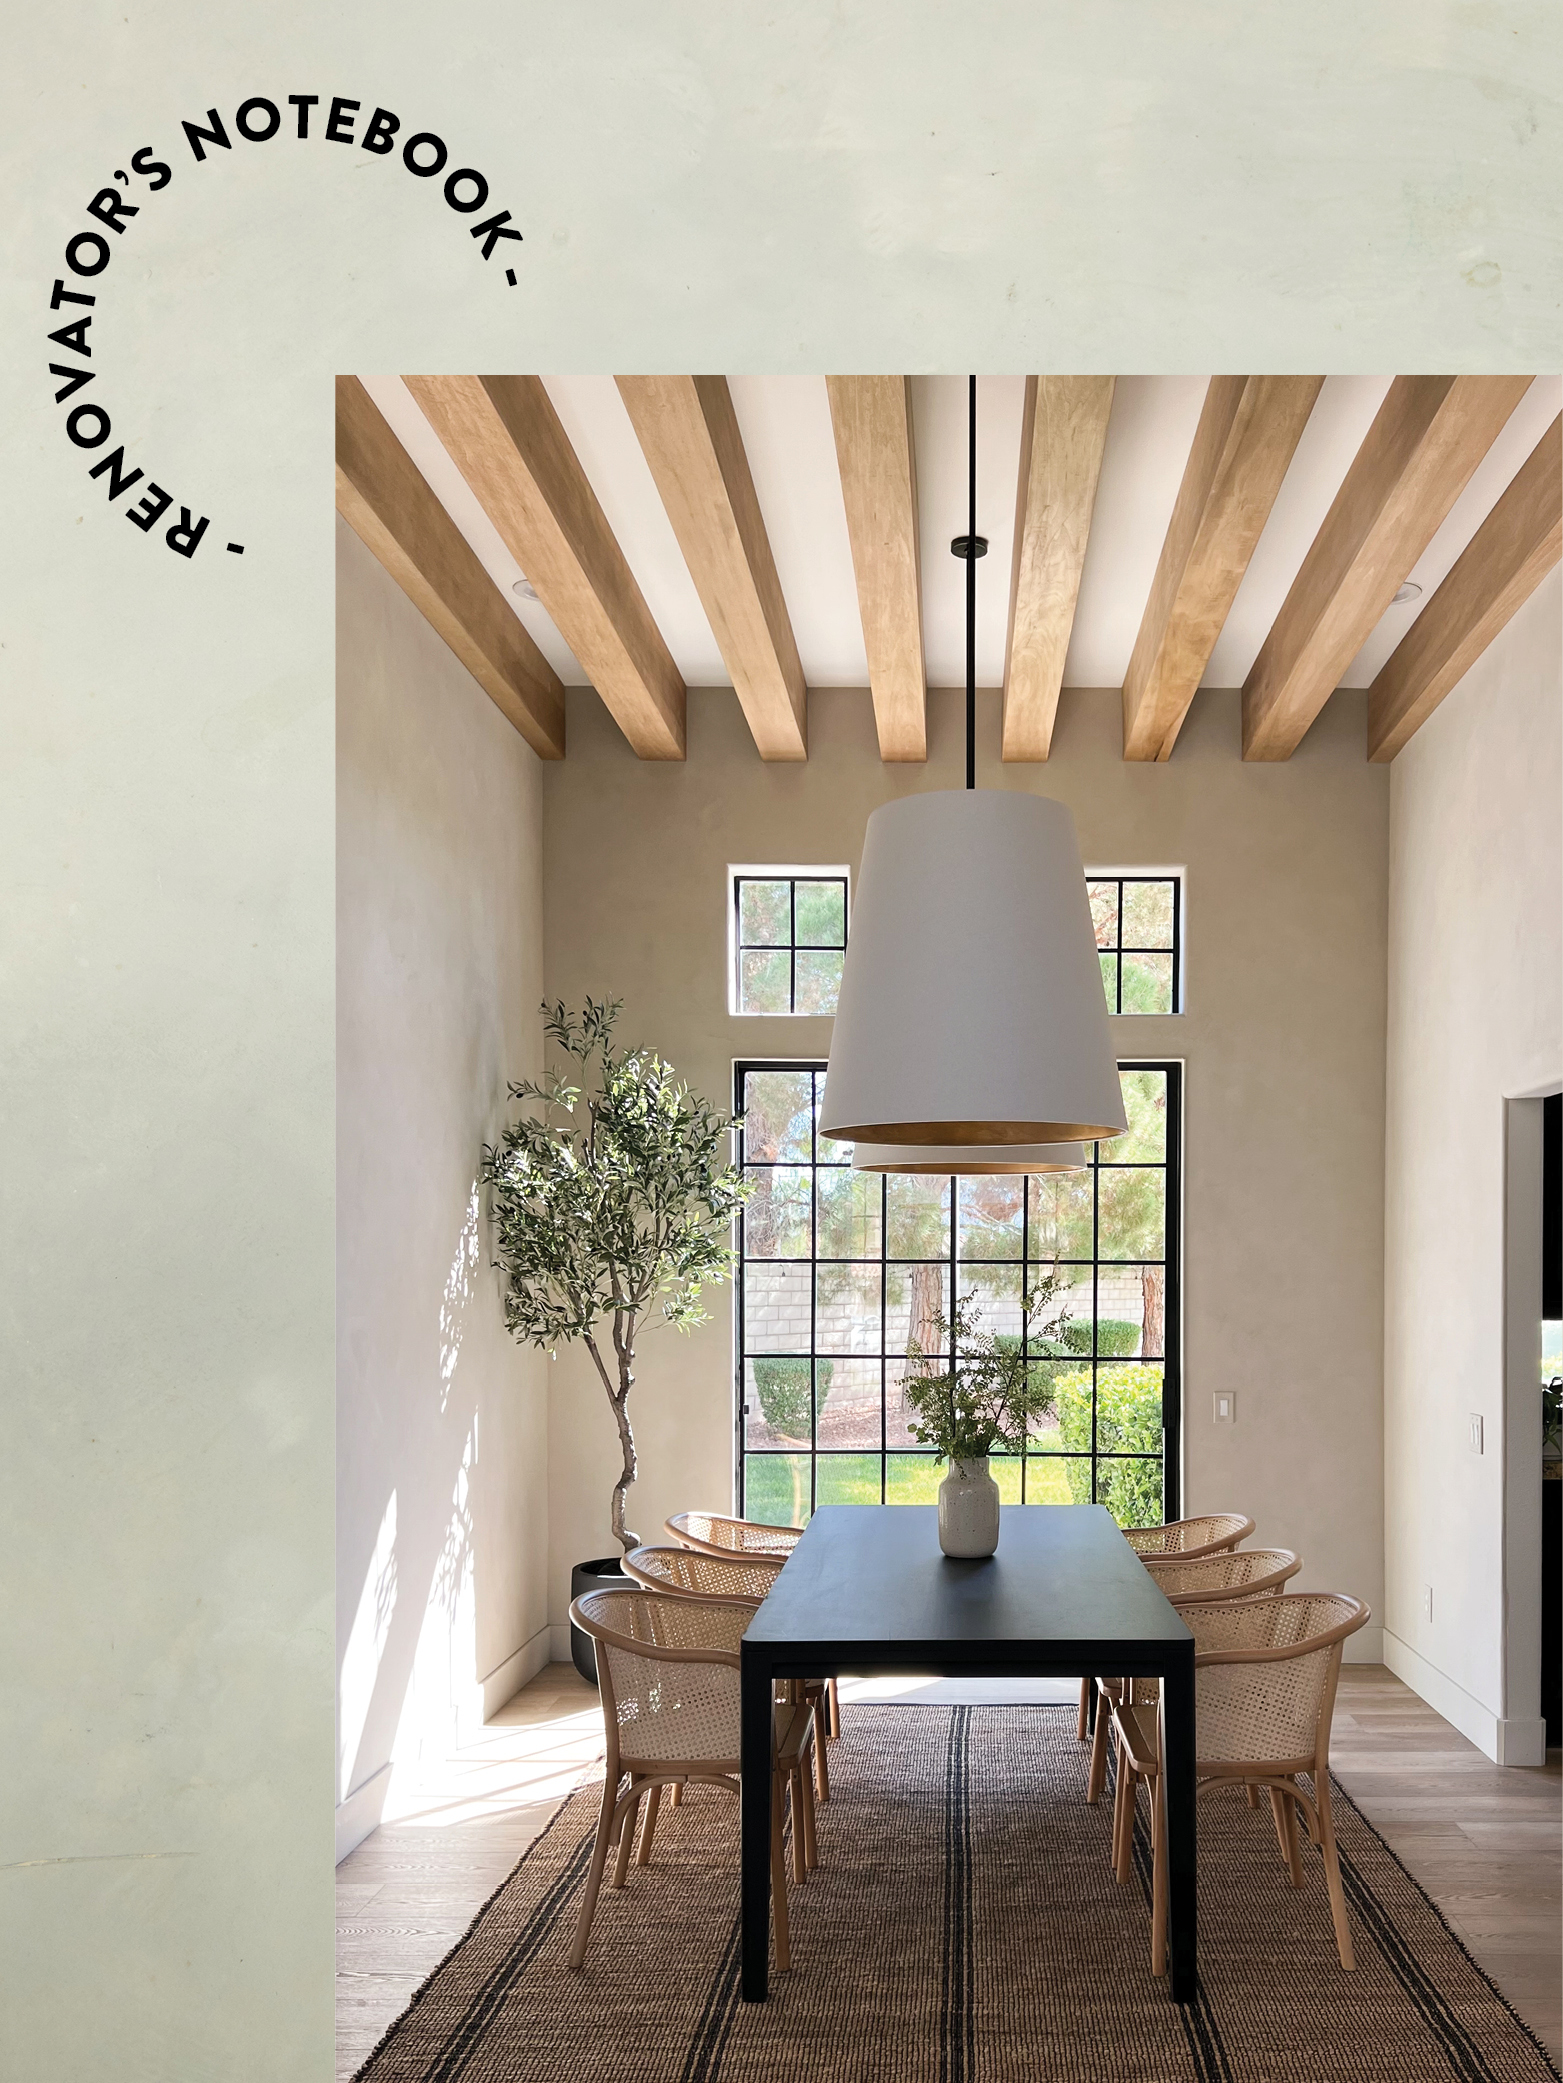
Having just put a down payment on her Las Vegas house, design blogger Angela Rose wasn’t in any position to swap out the dated windows and doors in the ’90s space (replacing just one of the latter can cost up to $1,500). But a $200 pane kit, a textured area rug from her just-launched Loloi collection, and a few glowy pendant shades were definitely within budget. “It’s a completely different home now when you walk in,” shares Rose.

After all, the whole reason Rose landed on this property after touring dozens of places was the dreamy backyard, complete with a pool and basketball court—and the views of it from the dining room. The problem was, the big sliding glass doors leading from the space to the patio were clad in bulky interior shutters. “I knew they had to come off,” recalls Rose. In her own words, the seasoned renovator reveals how she perfected her vantage point.
Shake Well for Modern Trim

Nothing made me more excited than knowing that spray-painting the outer edges of the windows and doorframe could transform the entire view. To prep the space, I got it nice and clean (for aluminum, you just need to wipe down the trim; for vinyl, I’d scuff it up a bit with sandpaper). While it’s tempting to get full coverage the first time around, I kept moving as I sprayed the Rustoleum paint and did three light coats to avoid any drip marks.
Get Griddy With It
This room is pretty large (the ceilings are 13 feet high!), and the light fixtures are 24 inches wide, so adding grids to the glass was a way to make the space feel more intimate. The PVC kit comes in white, so after I cut the joiner and trim parts to size with a handheld saw and connected them all, I once again pulled out my can of spray paint. But first, I covered the exterior-facing side with painter’s tape; that way it remains white and matches the rest of the home’s windows from the outside. Once the grids were dry, I attached them with clear foam double-sided tape.
Walk This Way

Before we moved in, I swapped out the old wood-look tile for stoneform flooring with a 20-year warranty. The scale of the rug on top was important, given this space is so vast. I chose the natural/black striped design from my jute Colton Collection—one of three in my 20-piece Loloi collaboration. (Aubrey features gorgeous printed designs with a vintage twist; Blake reimagines traditional antique styles, power loomed in warm earth tones with a hint of fringe.)
The beauty of this specific handwoven textured piece, made in India, is that it always looks clean even when crumbs inevitably fall to the floor. It’s available in seven sizes, but I opted for the 7’6”-by-9’6”; that way all the legs of the chairs can easily fit, making scooting in and out a breeze.
Brush With Greatness
I decided to go with Portola’s Roman Clay for the skim-coated walls to give a sense of soul and earthiness—and it only cost me $400. I used different sizes of putty knives to apply the material at random to achieve a soft effect. The whole project took close to 24 hours, mostly because the corners were tricky. If I were to do it again, I would have painted them a matching paint color and then overlapped it with the Roman Clay so I didn’t have to be so precise. Owning a couple sets of scaffolding was a huge help—it’s one of the first things I purchased for this new house because I didn’t want to be limited by my height.
Age With Grace

Both the chain and the inside of the $400 pendant lamps I found were bright gold, but I felt like the space needed more black elements to tie in with my Loloi rug. Naturally, I whipped out the black spray paint again and covered the chains. The inside of the fixtures just needed some roughing up with $8 Rub ’n Buff to tone it down to a bronze shade.
Beam Me Up
I crafted my own ceiling beams for $2,000 by mounting 2-by-6s to the joists with 3 ½-inch-long screws—they’re not going anywhere. Next, I fastened a series of three poplar planks (with mitered edges) together with tape and wood glue, forming U-shaped boxes for each joist. After everything dried, I hoisted the boxes up (with helping hands) and attached them to the 2-by-6s with 2-inch-long nails on both sides.
Once my mind starts reimagining a space, I can’t stop. Everywhere I look, I think, I could add this here or switch this out here. My dining room project lit a little spark in my heart, like: Hey, I can do this! It’s a good place to be.
